Tuesday, October 21, 2014

fast, last-minute halloween decorations

Halloween has always been one of my favorite times of the year to celebrate, but lately it seems to be so scary!  With my kids being such sponges about the world, I kind of want  to keep the decorations this year a little more simple and inviting for the neighborhood littles, because after all, they are really the costumes I want to see…and homemade, because…well, I'm feeling pretty cheap this year (although there are SO many sparkly skull heads I want to buy!).  We have a pretty good trick-or-treating neighborhood, so I definitely wanted to make it friendly and fun!!
 I found this fantastic and creative idea for kid's masks, but since my kids are small and won't keep anything on their faces or heads, I opted to modify it to make a decoration for my door instead.  I kinda love it.  And it was super fun. I used the templates from the other faces to make my own ghost and owl too.  Yes, that's supposed to be an owl. 
I also wanted to do something with spiderwebs that was fun but not scary, so I found some leftover embroidery hoops from projects I never did (geez, how many of those do I have…) and wrapped dollar store spider web-y stuff around them and stuck a few plastic spiders on them.  I used the removable hooks for outdoor use on my porch ceiling and hung them from those.  So simple and easy but I like the whimsy it creates!
Pumpkins.  Let's talk about pumpkins, or "punkys" as Miss P calls them.  So many years in the past I have totally forgotten about them on my porch and they leave a yucky rotten spot.  So this year, instead of carving (which I love but am not feeling this year), I got a few of the fake ones on sale and used a sharpie to "paint" a decoration on them.  I was inspired by some lace ideas I had seen around the interwebs and thought they had a great vintage-y vibe. 
Also with the one real pumpkin we did buy, I made some little cardboard bats to stick all around the top of it.  This was also super easy to do.  Just make a little template out of card stock and trace it onto scrap cardboard, then use a sharpie to color it in!  I had some leftover gold sticks from a previous project, so I just glued those onto the cardboard and then stuck them in the pumpkin.  You could use those bamboo skewers from the grocery store or even toothpicks if you fancy.  
You can always add tea or string lights couple days before and I still might make a couple friendly ghosts to add to our trees.  We will see…I still have to get working on those costumes.  
I can't wait to see all the little ones' costumes this year!!! 

Monday, September 22, 2014

DIY:: Simple Yarn Wall Art

Our bedroom has been through various stages of completion until I decide to change my mind on what to do with it.  For some reason, this has been the hardest room for me to complete.  I recently painted the wall a deep navy (Blue Fedora by Valspar), and needed something to break up the now big, blank, dark wall.  I had seen various yarn art ideas on Pinterest, but when I tried them, they ended up being a big fail.  My macrame skills are clearly not up to par…
My solution was just to use the beginning part of the tutorials for attaching the yarn to the branch (or whatever you choose to use).  I had been saving this branch for a while now, and this was the perfect project for it.  It obviously didn't want to be a tree anyway.
  
Supplies:: Various colors of yarn (I used 6 colors), scissors, branch/ dowel rod, copper tube…something to tie the yarn to.
Ready to get started?  You won't believe how simple it is…
1: Measure out one length of yarn you need and multiply it by two.  For example, my length needed to go behind my headboard was one and a half yards, so I cut all my yarn pieces to be three yards.  Fold your yarn in half to make a little loop and put it under the base you are using.  2: Fold the little loop over the top. 3: Reach through the loop and pull the tails through. 4: Pull the string taut.  You may need to push the loop together so that you can't see the dowel rod.  Continue adding your yarn pieces, switching colors as desired!!  
Wasn't that easy?!?!?!

This project was so much fun, I hope you will try one for your home!  It adds the perfect amount of color to our room without costing a lot of money- the best kind of project!  I just mounted it to the wall with some nails under strategic parts of the branch so it wouldn't fall off the wall and scare us in the middle of the night…no thanks.  

XO

bedding:: J.C. Penney / accent pillow:: Ikea / throw:: target / sconces:: urban outfitters

Tuesday, July 22, 2014

adventures in gardening

We planted a garden.  For real.  We are, like, so hip.
No, really, we learned a lot about what to do, what not to do, and our hopes for what our next garden will look like.  I wanted to share a little bit about our process and what we did along the way:
Since my husband manages a hardware store, sometimes he comes home with goodies that were on sale.  Thus, the beginning of the potatoes.  Someone had told him you could plant them in potato sacks, and since our soil here in Missouri is not that great (and we have moles in our yard…), we went the potato sack route.  We mixed compost, mulch, and topsoil.  It's always good to have a miniature helper (*wink)
Then we thought there we would be really brave and plant vegetables!  Behold…our little baby veggies and herbs:
In the Spring, we planted purple cabbage, cucumbers, cherry tomatoes, an heirloom tomato variety called "mr. stripey", green beans, jalapeƱos  banana peppers, green peppers, cilantro, basil, pineapple sage, and oregano.  After laying out our raised beds, we planted accordingly, based on how much space we thought each veggie or herb needed.  Note to self…plan better next year. 
After a few weeks...
And after a few months...

Ok, so here's what you really wanted to know: what worked and what didn't?

The good stuff…
:: use a GOOD mixture of topsoil, mulch, and compost
:: uh, remember to water…?
:: tomatoes are super easy to grow and will kind of take over…so keep that in mind
:: the veggies we have picked are DELICIOUS!!
:: it makes your backyard look nice

And the bad…
:: our potato crop failed/ rotted, most likely due to overly wet soil and not enough sunlight
:: we didn't use pesticides, and our cabbage had a little worms that were eating the leaves
:: some of the veggies were planted too close together, which stunted the growth of the
    plants underneath (cabbage on top of green beans = no sunlight = no bueno)
:: the layout of our space, though compact, was a little hard to reach, so next year, I'm
    planning to set it up like this: 

Though my green thumb still isn't very green (I recently killed a cactus by OVER watering), I'd say we learned a lot this year and I can't wait for our planting adventures next year!

Monday, March 31, 2014

nice to see you again...

Ok, so it's been since October since my last post (what!?!).  Clearly I need to be more on top of these things…
Before I had kids I always thought, I will NEVER be one of those people who doesn't have/make time for "normal" things.  Well, it happened.  Never say never.  I have kids (plural now) and I don't always have time to devote to all my creative ideas, but now that the nap time routine has been pretty much established, I may have time to get back to blogging!  Yay!  While I was away, the house has begun to take shape, though my constant rearranging still throws my husband for a loop.  I will be posting LOTS more DIY's and home:made ideas.  Stay tuned!

Monday, October 28, 2013

home : made:: clipboard photo wall


I wouldn't say I don't like blank walls, but when I see one, I always try to think of what can be done to make it more visually appealing.  This is especially true in our home, as we continue to empty boxes and finally stop painting!  I am pleased to report that over the weekend the very last living room wall was painted (happy dance!) but it left a blank space for me to fill.  Since I basically whitewashed the entire house to bring some brightness into it, I wanted something that could display some of my favorite colorful pieces of art and family photos, but also able to be changed with the seasons...I am SO non-committal when it comes to art.  Everything is inspiring, and I had stumbled across a few clipboard walls I liked on Pinterest (like this and this), so clipboards seemed like a good choice and it was a surprisingly quick project. 
 Supplies:: clipboards (found at Office Depot as a three pack for cheap!), laser level, clear push pins, tape measure, pencil, and pictures or other personal things you want to hang.

 1: After you decide where you want to hang your boards, I found it's easiest to put up the middle one first then work around it.  2: Mark your positioning with a pencil, insert a push pin,  then measure evenly to either side of the pin for the spacing between the boards, using the laser level as a guide. 3: Mark again with a pencil and insert your next set of pins. 4: With the laser level, determine how high or low you want your next set to go and mark again with a pencil and test to make sure it looks good. 5: Once you have your rows set, stand back, and admire your handiwork! Now it's time to decorate... 
 You can really just add whatever you like to get the look you want.  I plan on changing it often with family pictures, neat cards, and beautiful scraps of paper.  It's also great for the holidays with all the free printables that are out now!
I was so excited to come across this fall banner as a freebee that I changed up the usual pictures for something more festive.  I hope you try this somewhere in your home to bring a little whimsy to your decor! xo

Monday, October 21, 2013

DIY:: easy display shelves

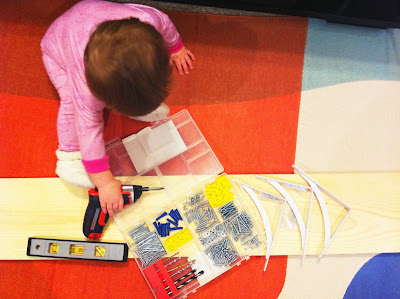
I've been away for a while...so many projects on my list to accomplish before this new addition to our family arrives in January...and so little time!  But I wanted to share this quick project I did to add a little something to our dining room:

As our home continues to take shape, I may eventually stop rearranging things and enjoy where they are...wait, who am I kidding, this process never ends and I like it!  Until then, on to my next project.  We have this big blank wall in our dining room that has been begging for something fun.  I have been looking for various bookshelves for our cookbooks, nicknacks, and things I don't want the kids to get into, but still have out.  Everything I found either wasn't quite what I wanted or way too pricey and I felt stuck.  My solution became a super simple (and easy!) set of shelves to both fill the space and be able to be rearranged when I get tired of it.  Voila!  

Supplies:: lumber- I used a 6 foot piece of the cheapest that I could find at my local hardware store: about $6,  three brackets, level, pencil, wall anchors/screw set, drill (helper is optional)
1: Figure out where the center of your board is.  This will be where your center bracket will go.  2: Mark your center on the wall using the bracket as a guide for the drill holes and mark with a pencil.  3: Drill a hole where your pencil marks are and hammer in an anchor to fit your screws. 4: Attach the bracket with the screws and then put the piece of lumber on top, matching your center mark and use two small screws to attach the lumber to the bracket.  5: Repeat these steps for both the left and right sides of the shelf.  6: Be sure to use a level to make sure your shelf is, well, level...because no one wants a wonky shelf.

Of course, now is the fun part, where you can fill it up with all your goodies!  I chose our cookbooks, a few nicknacks, and my birdcage collection...well...the ones that would fit.  I plan to add more and coordinate with the holidays, but you can bet it will be changed out often!  I hope you can use this idea somewhere in your home for a simple and fun way to display your collections.  
xo


Tuesday, October 8, 2013

etsy store is now open!

It's officially begun!  I am so excited to be opening my new Etsy shop featuring my handmade pom pom garlands and accessories.  There will be many new additions to the shop as I continue to spend evenings and Piper's nap time making my creations.  It actually took longer than I thought because I realized that I needed inventory!  Be sure to check back often, especially as the holidays get closer, so that you can snag some fun stuff to give as gifts!  I can't believe I actually did it, to be honest, but I am hopeful about where it will go.  It brings me joy to be able to share this with you and others.  
I do accept custom requests for this shop, so please let me know if there is something you are interested in!